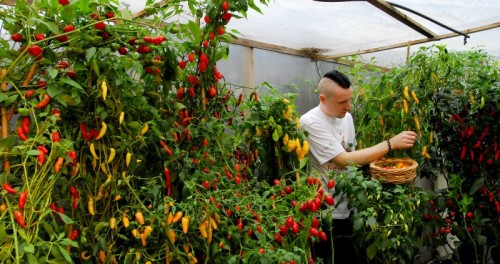
Fatalii’s recommended method for germinating chile pepper seeds
Recently, I’ve used only rockwool cubes for germinating and producing cuttings as they can be used for both; hydro & soil based growing.
After several years of growing I’ve tried quite a few methods for germinating.
Here’s the method I’ve found to be best for germinating different varieties at once.
My basic principles for germinating chile seeds are:
1. Careful selection of the varieties to germinate! Always germinate more plants than you need. Then choose the most vigorous plants and give the spares for your friends and relatives. Keep in mind that seeds are living creatures and they won’t all germinate, so it’s always better to have many vars to try.
Also, it’s a good idea to experiment with different varieties to find your own favorites. There’s so many different ones that it’s an experiment which will take years and it just gets better and better as you learn more about different chiles! 🙂
Get the chile pepper seeds from here: https://fataliiseeds.net
2. NO handling of the sensitive germs!
Germinated seeds should be left alone to germinate to minimize all risk of damaging them.
Simply, it’s no use to handle the poor newborns at this stage, therefore I’ve skipped all the magical mumbojumbo toilet paper or teabag germination methods. Just concentrate on temperatures and moisture they will come out just fine! 🙂
Methods involving unnecessary seed-handling will basically just increase the risk of the precious plants being damaged and stunted.
Rockwool cubes have worked very nicely even for the most difficult species and varieties including C. tovarii, C. flexuosum, C. praetermissum, C galapagoense, C. lanceolatum, C. cardenasii, C. exiumium, C. rhomboideum, C. buforum and tepins etc.
3. Sowing a large amount of varieties should be quick and easy task, and most importantly, it should be FUN as it’s the new beginning for your incoming season! 🙂
4. Moving germinated plants from germination tray to soil or hydros should be easy.
5. The risk for mold and worms should be minimized, therefore I recommend the use of rockwool cubes.
6. The medium should hold moisture very well and the watering should be easy without rinsing off the seeds, again what works here best is using rockwool cubes.
With rockwool cubes in a tray, it’s a good idea to keep some water at the bottom of the tray. Not too much.
In case you’re going to be away for several days, closed tray filled with rockwool cubes, holding enough water is good choice! Much better compared to soil sowing.
With this method you can leave the plants alone to germinate for a week or even weeks!
7. The last but definitely not the least important factor will be the temperature. Temperatures slightly below 30 degrees celsius work very nicely for practically all the capsicum species and varieties I’ve tried so far. (Nearly 1000 varieties, and all wild species available).
Remember that seeds are living creatures, germination percentage won’t usually be 100%
But the better conditions you give them, the closer to 100% you will get.
With some wild species and varieties, the percentages will be significantly lower.
And now…let’s start germinating!
First you need to have some cheap equipment for the germinating:
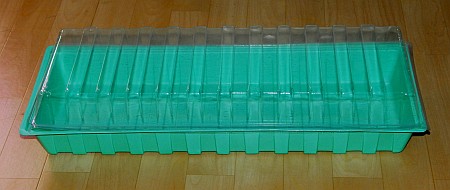
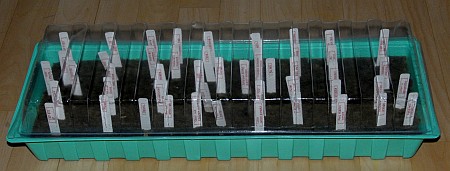
A “mini-greenhouse” / germinating tray.
You can use it over and over
again for the next seasons to come.
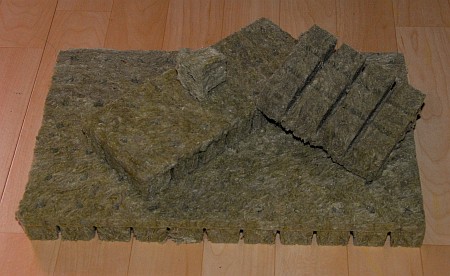
Rockwool cubes.
These are the most revolutionary invention for germinating (and for taking cuttings) there is!
They really raised my germination percent with even the most difficult varieties and species!
They are hygienic, they retain moisture very well, they are easy to maintain and handle.
Also, you can see immediately when the seeds sprout!
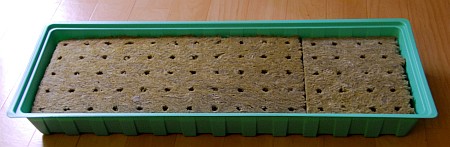
I like to use these small cubes meant for germinating seeds as they have hollow where to place the seeds, very important if you want to seeds stay where they are when watering.
Also, ideal to have it all there if you are germinating more than few varieties.
The hollow on the rockwool cube also holds moisture better and therefore gives the seeds better chance to germinate successfully.
Another positive thing is that you can see the seeds all the time, when they start germinating, you will notice it immediately!
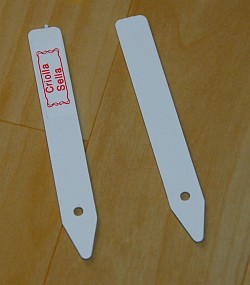
Label sticks.
These are useful to place in the rockwool cubes to have all varieties lablel exactly.
Don’t try to memorize them as you’ll most likely forgot about what they are,
and it really can piss you off later on, I’ve done it couple of times in the beginning.
To label these sticks, make sure to use labels (stickers) that stay there all season long.
I used to do the marking with permanent marker and little by little they faded away in the greenhouse and outdoors. Most decent dymo stickers hold on just nicely, all season long.
You can also use temporary pen marked labels at this point, and change them later. Whatever you think of is good. (one cheap example it a match-stick and a tape that holds writing… just make a flag and label it. 🙂
Or use other methods for labeling that you like.
Temperature meter.
This isn’t 100% necessary, but I highly recommend getting one as it affects the germinating
percentage dramatically knowing where the best spot for germinating is!
You can get one with little low price and they usually work just fine.
Just make sure there’s a outdoor sensor which you can insert into a rockwool cube to monitor exact temperatures of the seeds.
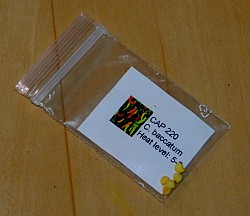
Seeds.
And of course, most importantly, you need seeds to germinate.
Here’s a link for the best varieties available:
https://fataliiseeds.net
There are big differences between different chile varieties.
The ones you can find from markets are usually the most demanding and non-prolific for home growers, instead, many common south american species like C. baccatums are the easiest to start with.
If you mostly like them HOT, choose some C. chinenses
(this species is well known for Habanero’s and other varieties that contain the hottest ones!).
If you find it hard to decide what kinds of varieties you want to grow, just select some very different ones randomly.
After the season you’ll definitely know the direction where you want to go, as variety selections are mostly about the matter of taste.
It’s also good to think about the use of the plants.. see below:
Do you want to grow:
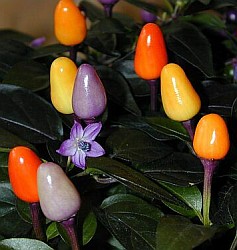
Ornamentals for decorating.
or
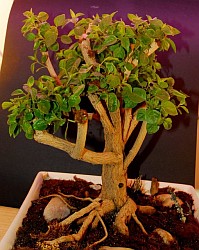
Bonsai chiles.
For fun & decorating purposes also. (more info at www.fatalii.net/bonsai)
or
Tasty, useful varieties to spice up your food?
I like to have all possible types!
Check the collection here:
https://fataliiseeds.net
OK, now, let’s proceed.
Place the rockwool cubes in the germinating tray.
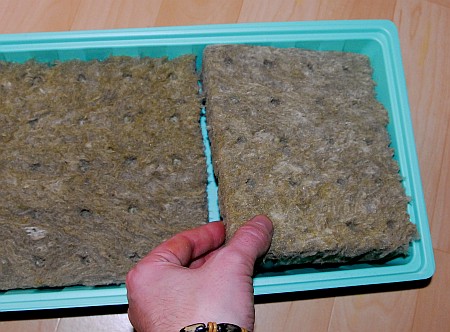
Cut a slab of rockwool cubes you bought according to the size of the germinating tray you have to fit the cubes inside.
The germinating tray I use holds 80 pieces of rockwool cubes, a nice batch to germinate at once! 🙂
Water the rockwool cubes
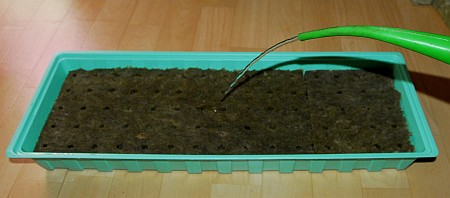
I do this with hot water (as hot as the tap water can be) just because I like to think it might
kill some possible (but unlikely) bacteria or bugs.
Most importantly, the cubes are still warm when I start sowing the seeds.
Colder water will do also just fine as the rockwool cubes will eventually get warmer anyway.
Water the rockwool cubes thoroughly and make sure there are no dry spots even though the rockwool cubes will absorb water just nicely.
There can be some water on the bottom of the tray to keep the rockwool cubes wet a little longer.
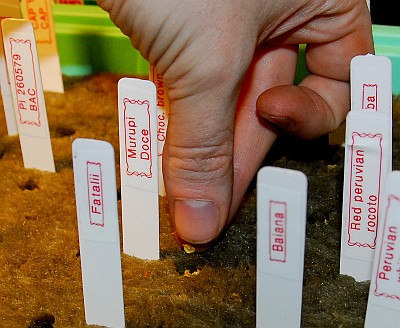
Label the rockwool cubes
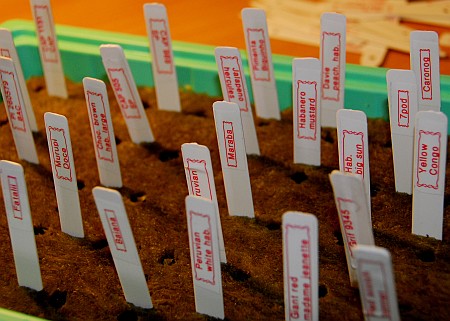
You can use one label for several rockwool cubes that contain seeds from the same variety.
Just place the labels carefully and cut them when it’s all done.
It’s recommended to place all the labels before cutting them.
It’s very easy to move the labels later until you are sure to have a sowing plan you want to hold on to.
Cutting the cubes is explained a little later.
If you want to use only one cube, stick the label on the rockwool cube, so that there will be space for the plant in the middle.
If you want to use two cubes for the same variety, just stick one label between those 2 cubes and so on.
Later, when you need to separate the germinated seedlings, make more labels for them.
This minimazes the work put in the labeling of the varieties.
Cutting the cubes
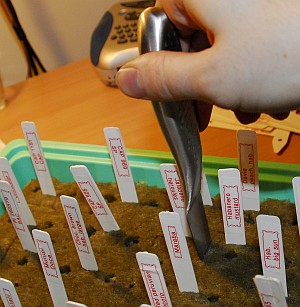
After you have planned your sowing setup thoroughly, it’s time to cut the rockwool cube slabs according to your labels.
Use a sharp knife and “saw” the cubes, keep in mind that this will make your knife duller, so choose a knife that isn’t the most valuable you have.
Wet cubes can be cut quite easily so it’s a quite quick task to do.
Just cut them properly to make sure they’re easy to remove from the tray later when needed.
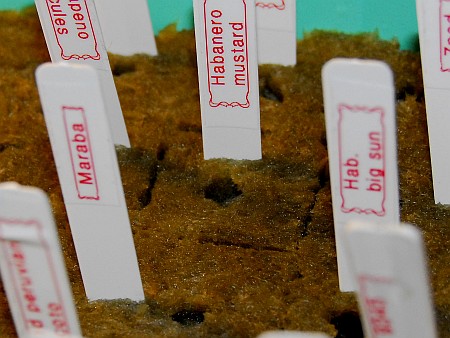
Cutted rockwool cubes.
Planting seeds
And now, the most critical part of the process!
One variety at the time, sow the seeds carefully in the right rockwool cube(s).
You can sow a few seeds for every rockwool cube and then pinch of the extra seedlings later.
Or, if you have plenty of space available in the rockwool cubes, you can sow just one seed per each rockwool cube.
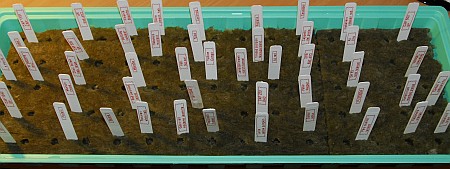
Ok, sowing done!
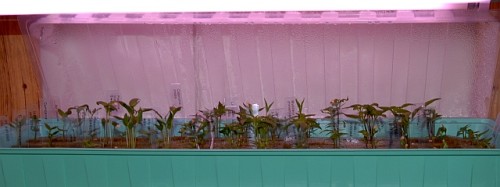
Germinating tray filled with many different varieties.
Now only some easy steps left to do.
Find the best spot for germinating
At his point it’s important to have a place with appropriate temperature.
A little below 30C works perfectly, explained little later.
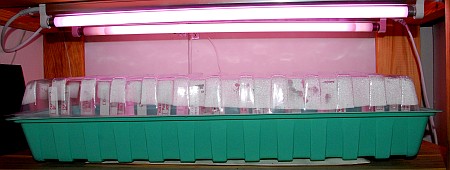
Best is to have heating mat that provides a stable supply of heat.
Many heating mats have thermostats to keep the temperatures steady.
Other options for heating are lamps. Fluorescent tubes just above the germinating tray will heat up the rockwool cubes nicely.
Floor heating can work nicely too, or simply place the germinating tray near the radiators.
Just monitor the temperature levels of the rockwool cubes and find out the best spot for the germinating tray.
Insert the temperature sensor in the rockwool cube.
Inserting the sensor in the rockwool cube.
At this point, stick the temperature sensor to rockwool around the middle of your germinating tray.
The ideal temperature that works for all capsicums is a little below 30C degrees, I’ve used temperatures between 27-29C with most success.
Higher temps encourage growth of molds and worms that will kill your seeds (germinated or ungerminated).
Lower temps cause the seeds germinate much slower.. which increases the risk of mold and/or worms to get the seeds before they germinate.
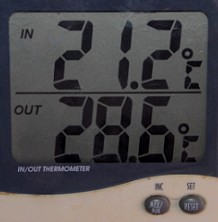
Upper: temperature of the growing room
Lower: Temperature in the rockwool cube; this is where the seeds are germinating.
In this example, the temperature is currently ideal for germinating.
Sprouting in average usually takes 1-4 weeks with appropriate temperature.
It varies a lot depending on the varieties and species you’ve sown.
Some wild species can take very long to germinate so it’s good provide steady conditions especially for them.
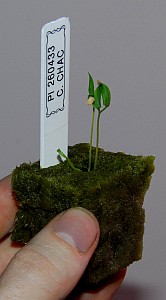
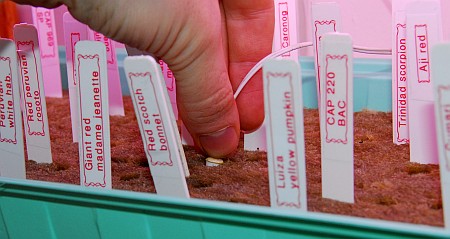
In this case I had sown four seeds in one cube and three of them germinated.
Now I’m going to pinch off the extra seedlings…

At this point it’s possible to move the extra seedlings to rockwool cubes but I highly recommend using several rockwool cubes for germinating several plants to minimize the need of unnecessary handling of the very fragile seedlings. Also the roots will snap quite often when pinching the extra seedlings off.
One option is to leave a few seedlings growing in one cube.
You can then leave the seedling in a germinating tray (or separate growing tray).
Just make sure it has plenty of light. If you’re using fluorescent tubes, around 5-10cm distance from the tube is ok at the seed leaf stage.
Later when there are few pairs of true leaves, move the seedlings closer.. as close as few cm from the tube.
When the seedling is ready for for further growing it can be moved to hydroponic system or planted to a pot filled with soil.
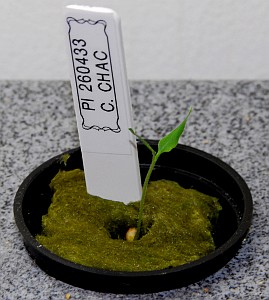
Sprouted seedling transferred to Cuttingboard -hydroponic system which
makes seedling -growing very easy and efficient.
More about growing germinated plants here.
And about hydroponic growing, here.
When to germinate?
This depends of where you live of course, but the rule of thumb is: BE EARLY!
Nothing is more frustrating but starting the season so late that you won’t have any pods before the season is over.
Of course, if you’re growing chiles first time and just want to have few pods to taste, it isn’t a problem to start later and bloom the plants earlier in smaller pots.
But if you’re looking for good yields, take full advantage of sun and start when it’s still dark.. when spring arrives, the plants should have already been germinated.
If you intend to use artificial light only, then you can germinate whenever you want.
As an example, in Finland it’s good to germinate when the year changes or as quick after that as possible, this is wrong time to be lazy when you want to have nice yields! You can get lazy when the seeds are germinating! 🙂
Slowest varieties even before the year changes, and some faster ones can be sown later.
If you’re intending to grow in soil, it’s even more important to start early.
With hydroponics, you can start a little later as the plants will grow and produce much faster.
But still, starting earlier will mean more yield! 🙂
Some smaller plans have been germinated in june-july and still had some pods at the end of the year.. might be enough for testing some variety to see if it’s any good.
Storing seeds
You should keep seeds in a dark, dry and preferably cool conditions. Even though room temperature, like some closet or drawer will be just fine.
When stored this way, seeds can stay viable for several years, even for decades!
Did I miss something important?
If you have things I should add (germinating stuff that aren’t included in the growing sections), then let me know: fatalii at sci.fi and I’ll add it here.
Other articles are very welcomed, the most productive publishers will be rewarded with a collection of seeds and powders!
Topic is free (at least it’s capsicum or other garden vegetable related).
Email me and ask if you have some idea before writing it.
Get the chile pepper seeds from here: https://fataliiseeds.net